파이썬 RESTAPI 서버 구현
🎮 코드로서구현 | June 30, 2021
실습 목표
django rest framework를 이용해 API 서버를 간단하게 구축해보기
기본 환경 구성
- 파이썬 가상 개발환경 구축 및 설정
$ python -m venv venv
$ . venv/Script/activate-
필요한 라이브러리 설치
- 장고
- 장고 REST 프레임워크
$ pip install django
$ pip install djangorestframework-
새로운 장고 프로젝트 생성
- Django API 프로젝트 생성
$ django-admin startproject example .- 마이그레이트 필요한 테이블 생성 & 관리자 유저 생성
$ ./manage.py migrate
$ ./manage.py createsuperuser # 관리자 유저 생성
djangorestframework를 사용하기 위한 구성
urls.py전체 수정
from django.urls import path, include
from django.contrib.auth.models import User
from rest_framework import serializers, viewsets, routers

# Serializers define the API representation.
class UserSerializer(serializers.HyperlinkedModelSerializer):
    class Meta:
        model = User
        fields = ['url', 'username', 'email', 'is_staff']


# ViewSets define the view behavior.
class UserViewSet(viewsets.ModelViewSet):
    queryset = User.objects.all()
    serializer_class = UserSerializer


# Routers provide a way of automatically determining the URL conf.
router = routers.DefaultRouter()
router.register(r'users', UserViewSet)


# Wire up our API using automatic URL routing.
# Additionally, we include login URLs for the browsable API.
urlpatterns = [
    path('', include(router.urls)),
    path('api-auth/', include('rest_framework.urls', namespace='rest_framework')),
]settings.py수정
INSTALLED_APPS = [
    ...  # Make sure to include the default installed apps here.
    'rest_framework', # << 해당 코드 추가
]

# 하위 코드 모두 추가
REST_FRAMEWORK = {
    # Use Django's standard `django.contrib.auth` permissions,
    # or allow read-only access for unauthenticated users.
    'DEFAULT_PERMISSION_CLASSES': [
        'rest_framework.permissions.DjangoModelPermissionsOrAnonReadOnly',
    ]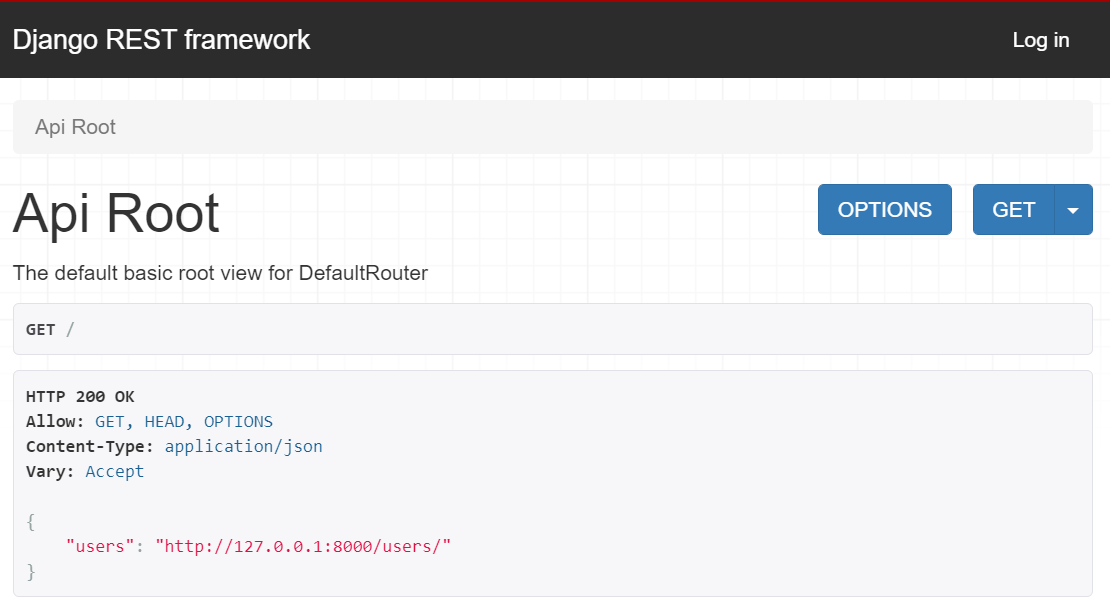
}- 장고 API 서버 실행
$ ./manage.py runserver- 정상적으로 실행된 모습
테스트
- 유저 조회해보기
# 해당 명령어에서 admin, password 부분을 수정해서 질의를 날려야 함
# 저는 superuser로 `user1`/`user1` 으로 설정해 두었기에 밑에 사진에서 해당 명령어를 확인할 수 있습니다.
$ curl -H 'Accept: application/json; indent=4' -u admin:password http://127.0.0.1:8000/users/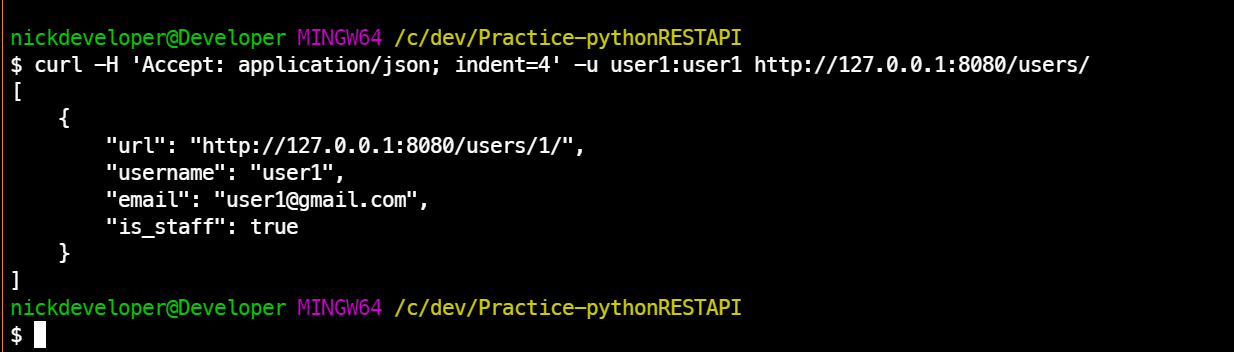
Reference
https://github.com/encode/django-rest-framework/
https://www.youtube.com/watch?v=TTOL-jzc-7E
